Installation of Citrix Xenserver 6.5 Guide
1. The first step in the installation is to download the XenServer ISO file. This can easily be accomplished by visiting the link above or using the ‘wget‘ utility on a Linux system.# wget -c http://downloadns.citrix.com.edgesuite.net/10175/XenServer-6.5.0-xenserver.org-install-cd.iso
Now burn the ISO to a CD or using ‘dd‘ to copy the ISO to a flash drive.# dd if=XenServer-6.5.0-xenserver.org-install-cd.iso of=</path/to/usb/drive>
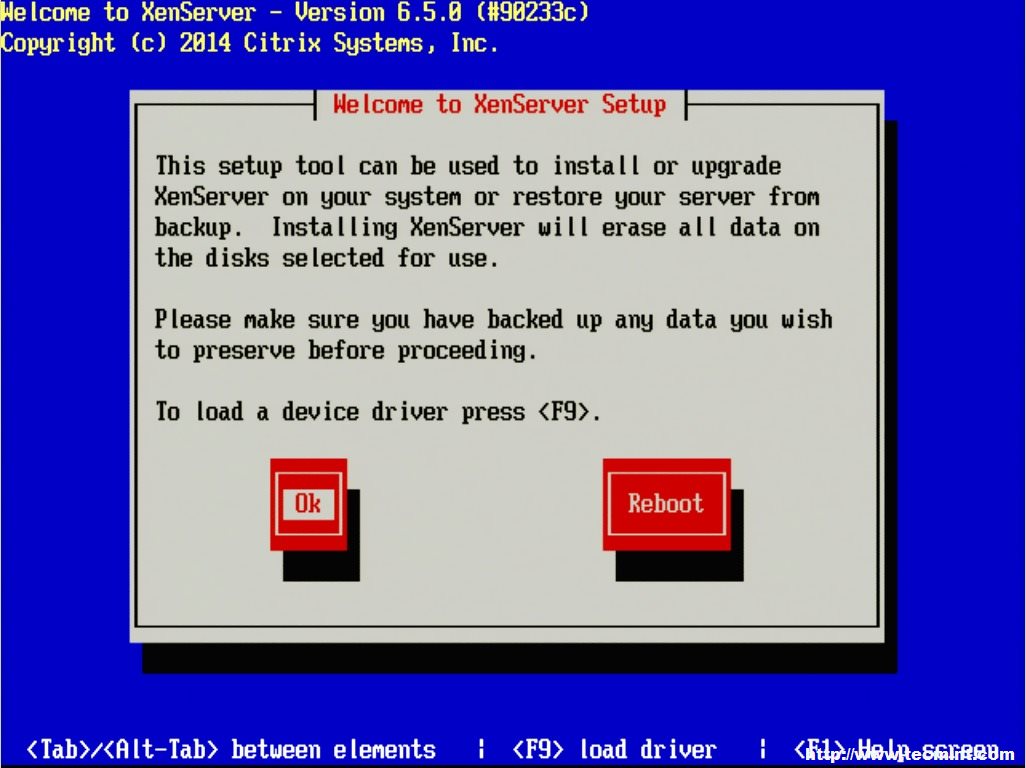
2. Now place the media into the system that XenServer will be installed and boot to that media. Upon successful boot the user should be greeted by the wonderful Citrix XenServer boot splash.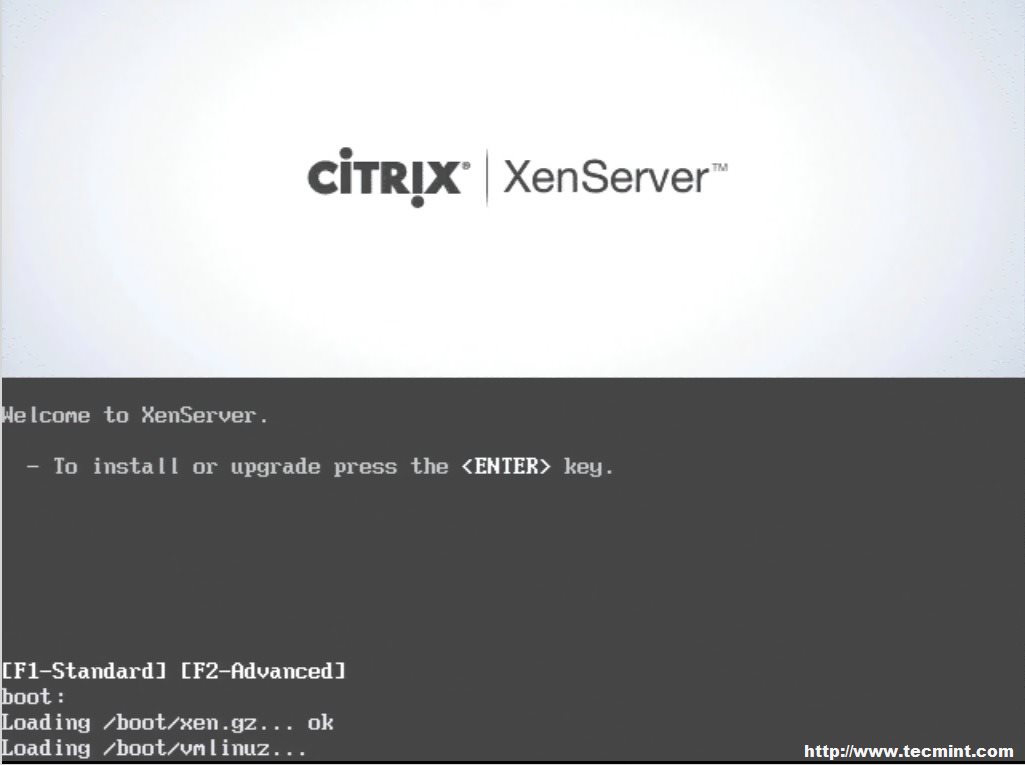
XenServer Boot Menu

Select XenServer Installation Language
Load XenServer Device Driver
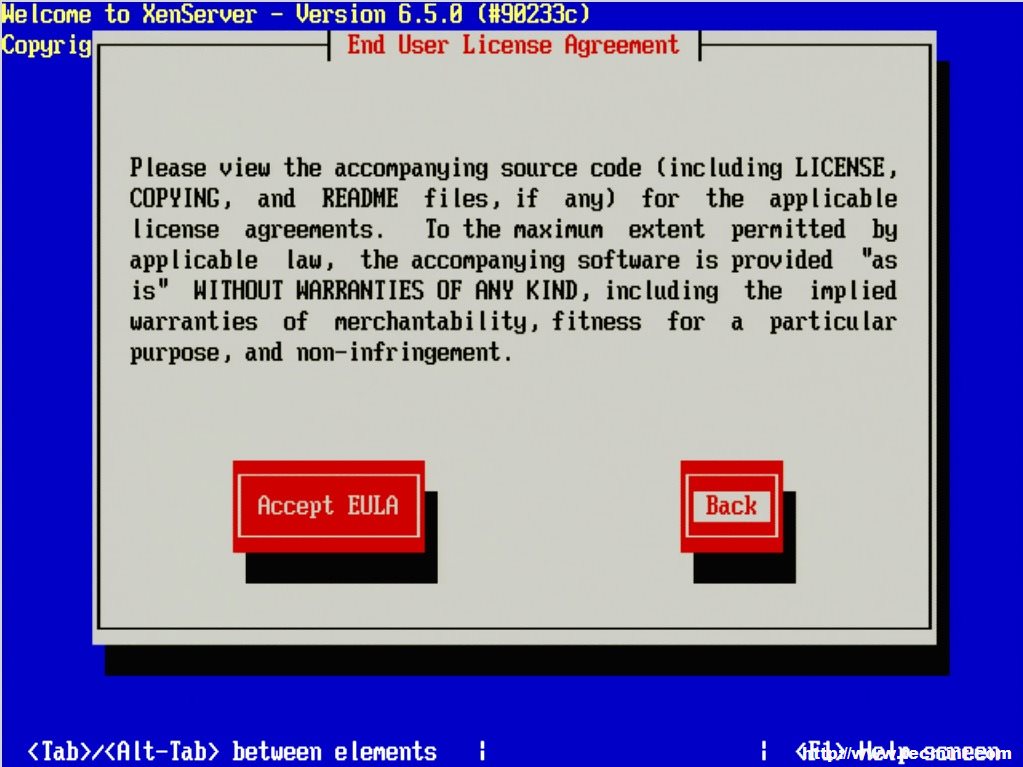
Accept License Agreement
The RAID system is reflected as “sda – 556 GB [IBM ServeRAID-MR10k]” For this guide, thin provisioning is not necessary. Make sure the the asterisk ( * ) character is next to the hard drive selection to install XenServer and tab to the “OK” button.
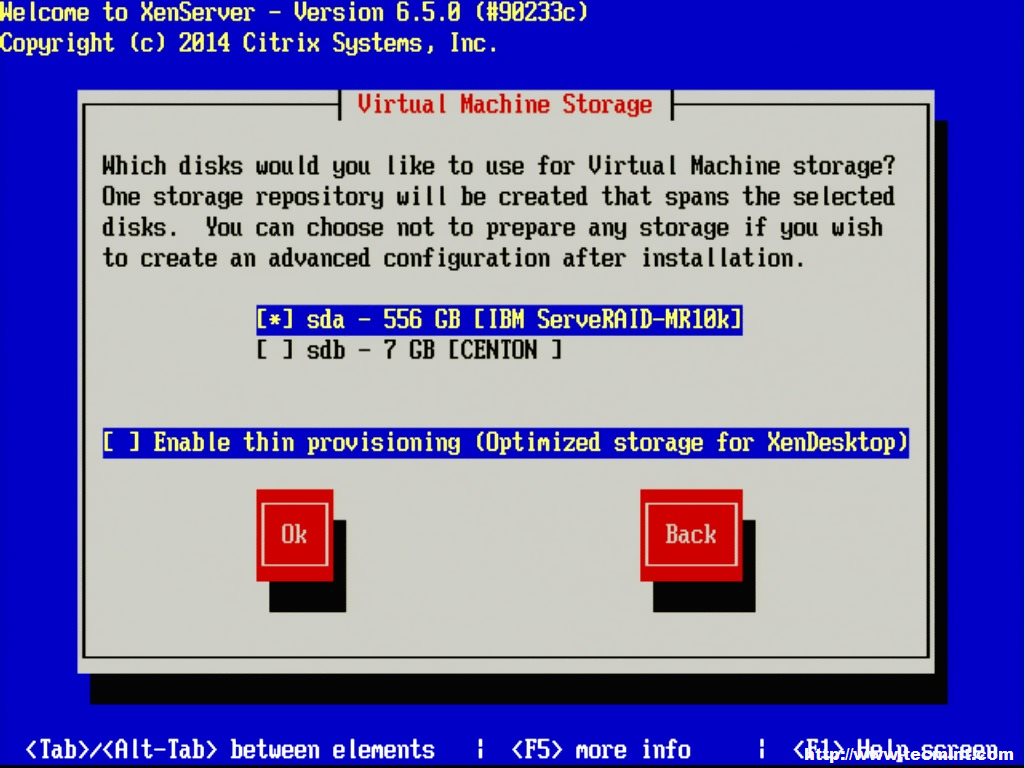
Select XenServer Virtual Machine Storage
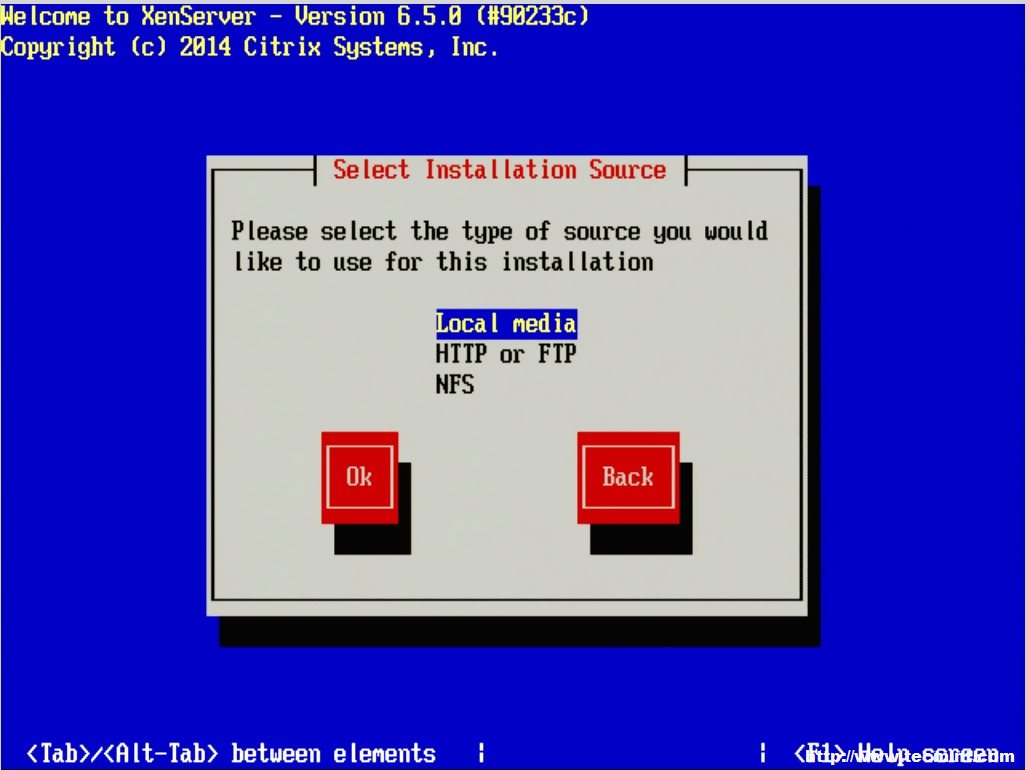
Select XenServer Installation Source
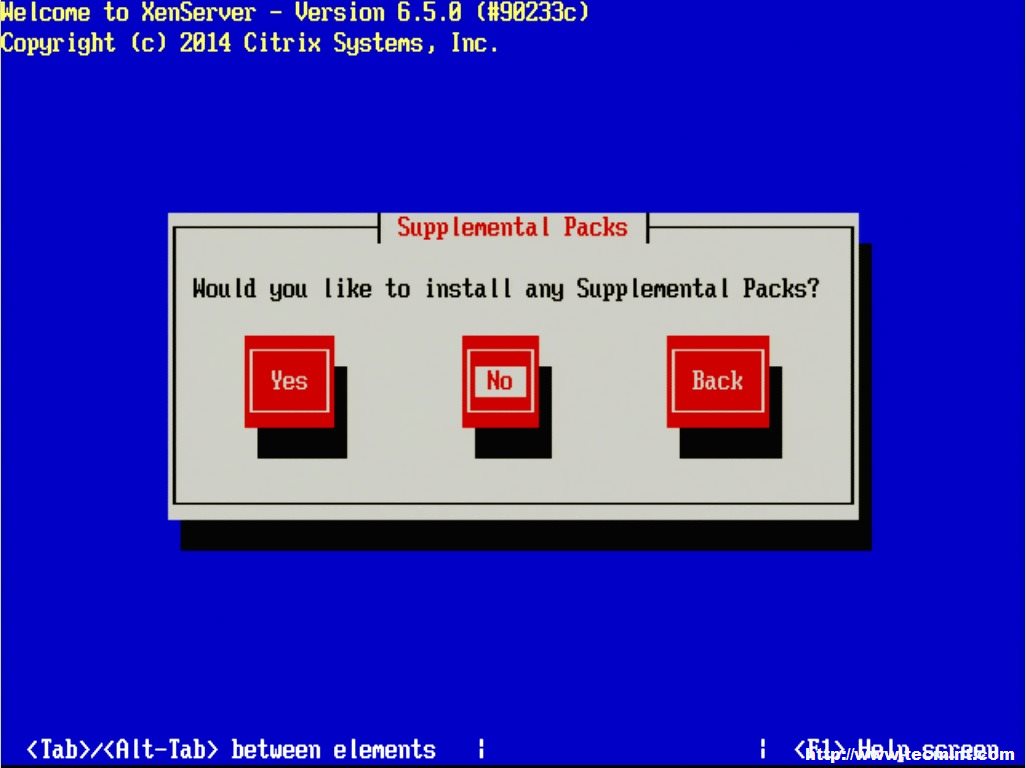
Select Supplemental Packs
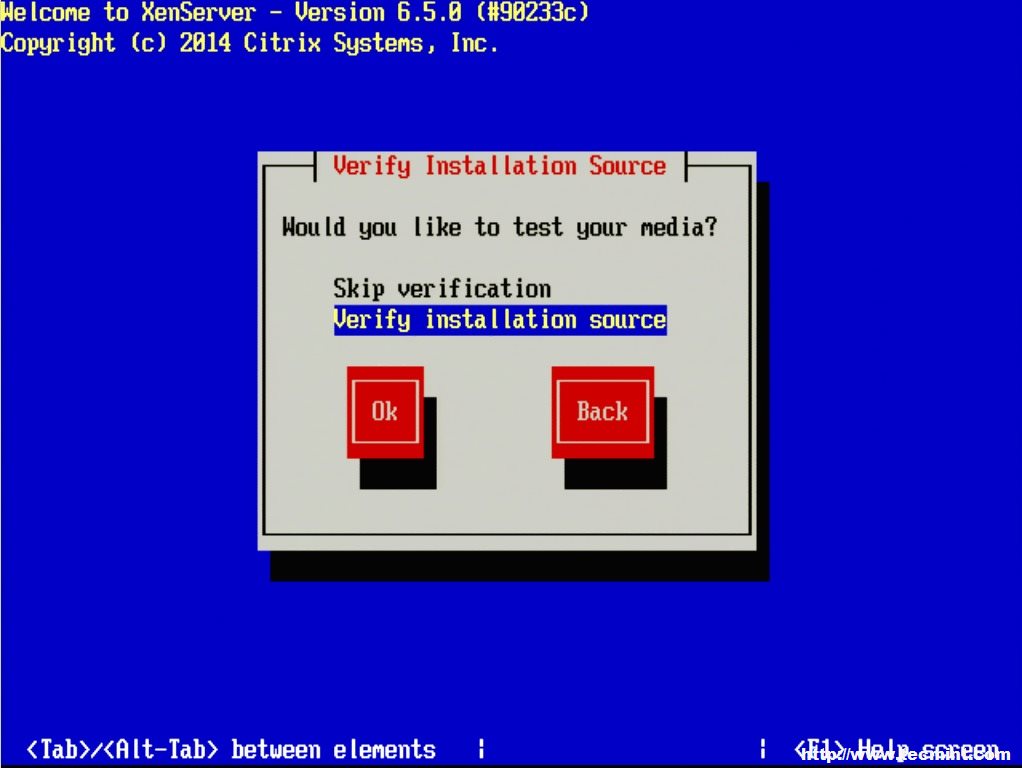
Verify XenServer Installation Media

Checking Base Pack
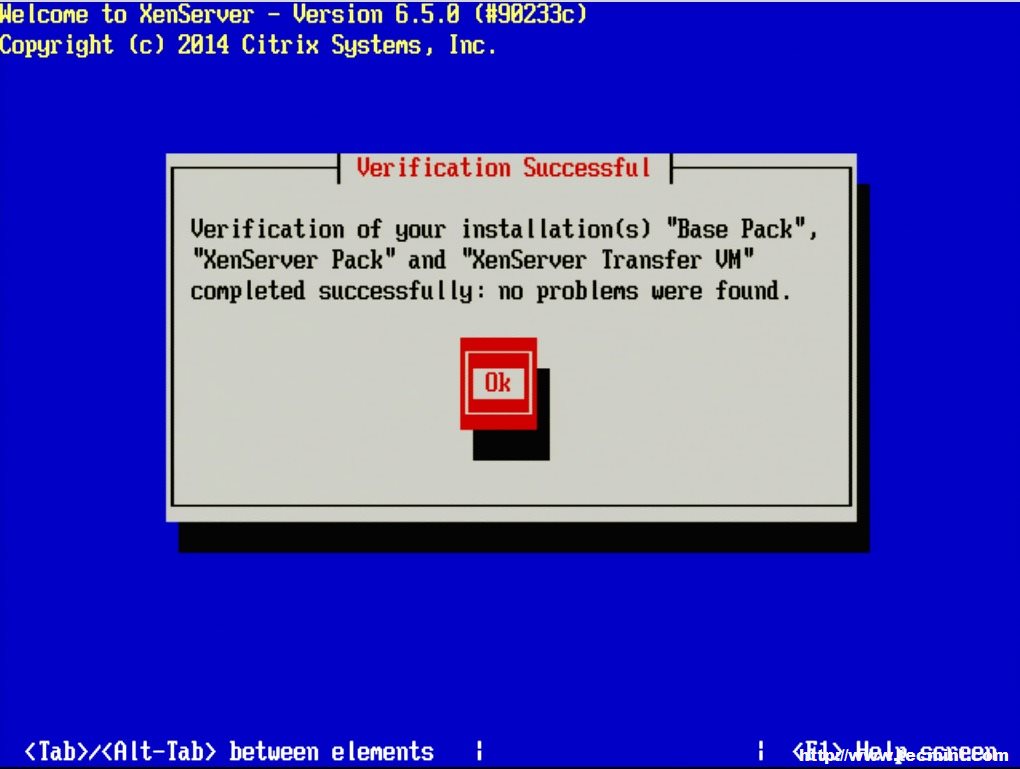
Verification Successful
10. Once the verification is completed, if selected
during install, the XenServer installer will ask the user to setup some
system information.
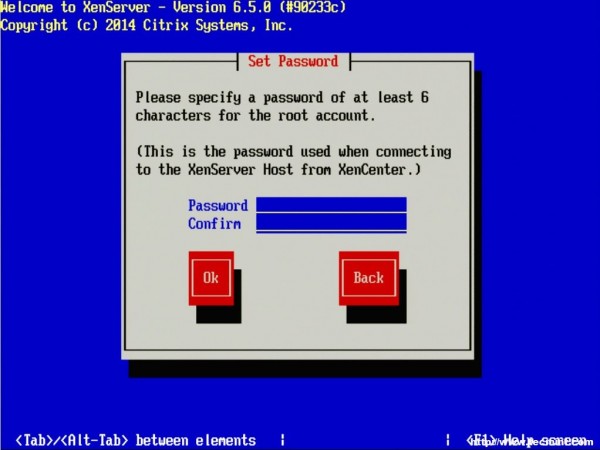
The first prompt will be to set the root user’s password. Now, since XenServer will be the underlying system to potentially several important virtualized servers, it is imperative that the password be secured as well as sufficiently complex!
Important: Do not forget this password either as there will not be any other users on the system once the installer finishes!
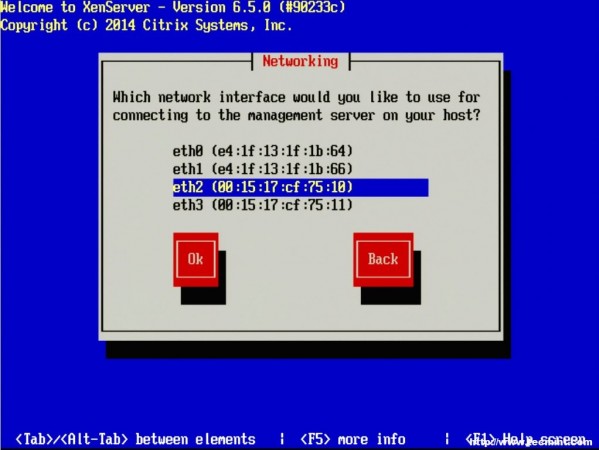
11. The next screen will ask the user to chose a
management interface. The number of interfaces that shows up will vary
from system to system and the management interface doesn’t have to be a
separate interface. A separate interface can be used to secure
administrative access to the hypervisor itself.
12.
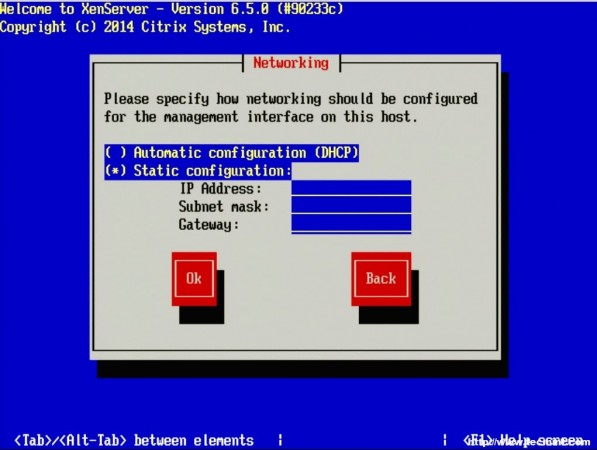
Once the management interface is selected, the system will prompt for
how to obtain an IP address for the management interface. This step will
obviously vary from site to site as well.
13. After determining the IP address information for the XenServer, the system will ask for a hostname to be set as well as DNS server configuration.

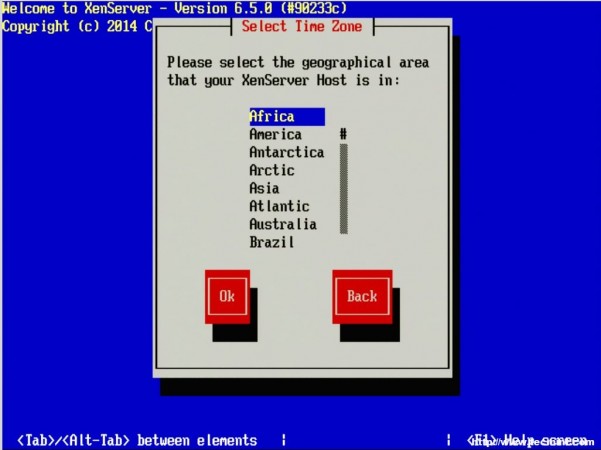
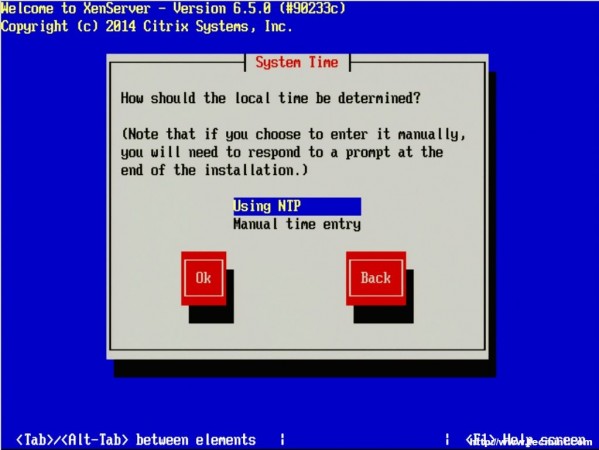
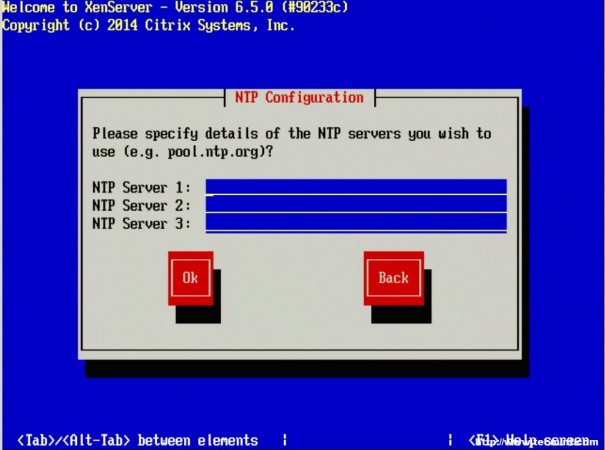
14. The next three screens will go through the steps
of setting up time zones as well as the method for keeping track of
time. Generally, Network Time Protocol is suggested for keeping system time synchronized on systems but again this will vary from location to location.
If a network time server isn’t available or the XenServer doesn’t have access to the Internet time servers, the installer will allow for manual time setting.
15. At this point all of the initial configuration
parameters will be complete and the XenServer installer will be ready to
begin the installation of the hypervisor.
WARNING – Continuing at this point WILL ERASE ALL DATA on the target disks!

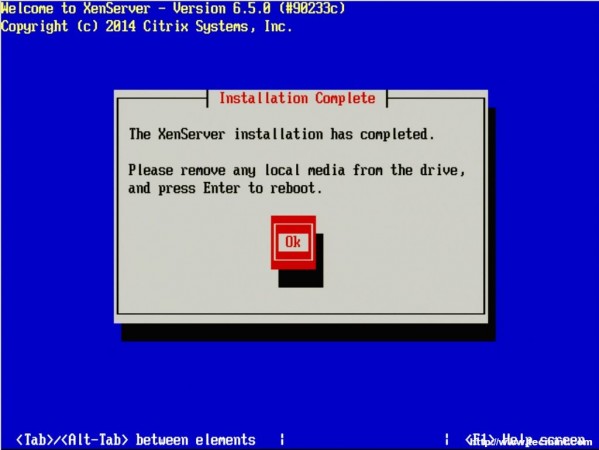
16. The installation will take some time but a
progress bar will be displayed. Once the installer is done, it will
prompt the user to restart the system to boot to the newly installed
hypervisor (be sure to remove the XenServer installation disk upon
reboot).

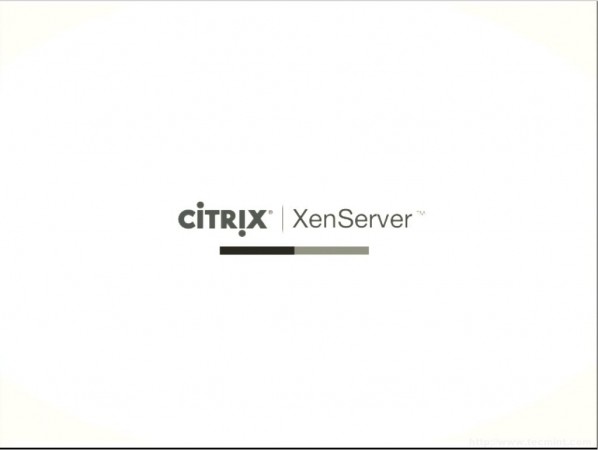
17. Upon removing the installation media and rebooting the system, the user should be presented with the Citrix XenServer splash page. Allow the system to continue booting.
18. Once the booting has completed, the system will present the XenServer control page.
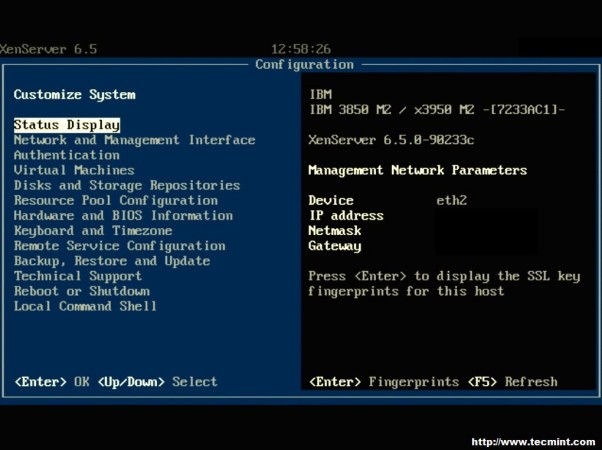
Congratulations! XenServer was successfully
installed and is now ready to have any hotfixes/supplemental packs
applied, storage repositories designated, and ultimately virtual
machines created. The next step in this series will address the methods
available to patch a XenServer system with patches from Citrix.
Source : https://www.tecmint.com/citrix-xenserver-installation-and-network-configuration-in-linux/2/
The first prompt will be to set the root user’s password. Now, since XenServer will be the underlying system to potentially several important virtualized servers, it is imperative that the password be secured as well as sufficiently complex!
Important: Do not forget this password either as there will not be any other users on the system once the installer finishes!
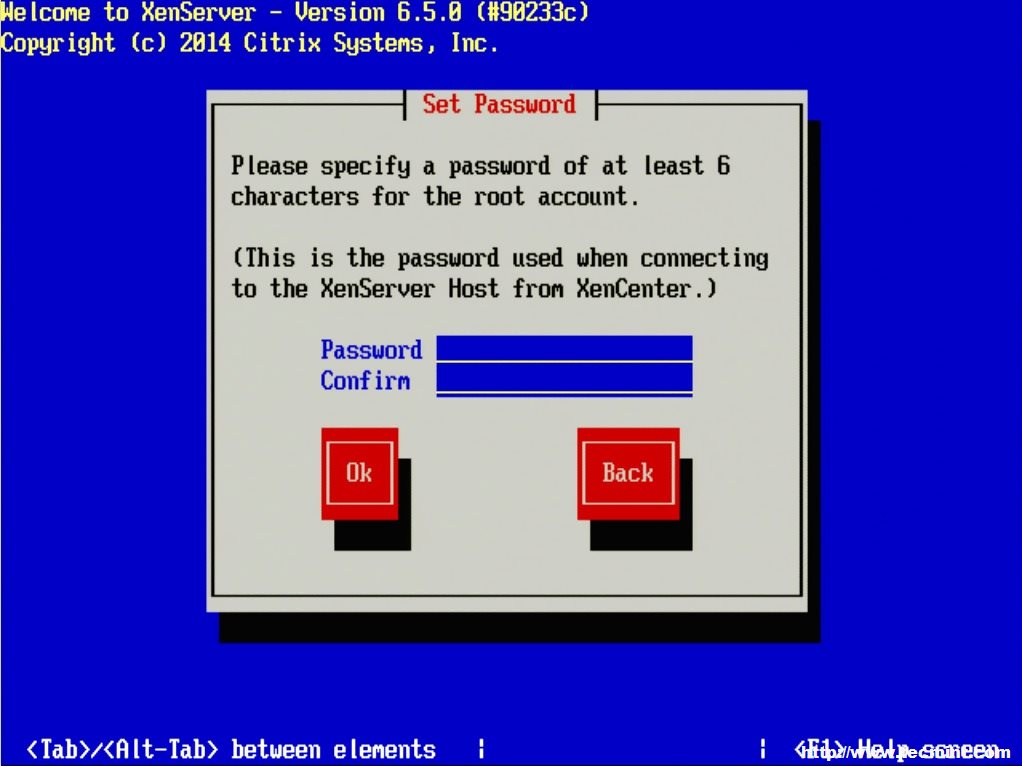
Set XenServer Root Password

Configure XenServer Network

Set XenServer IP Address
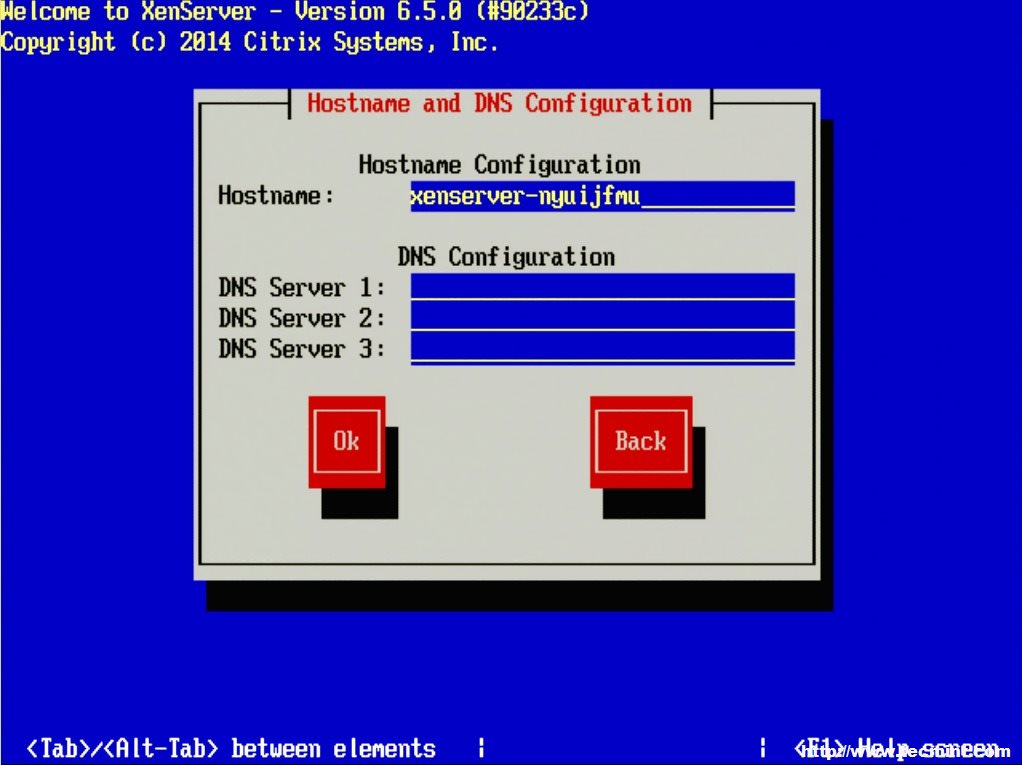
Hostname and DNS Configuration
If a network time server isn’t available or the XenServer doesn’t have access to the Internet time servers, the installer will allow for manual time setting.
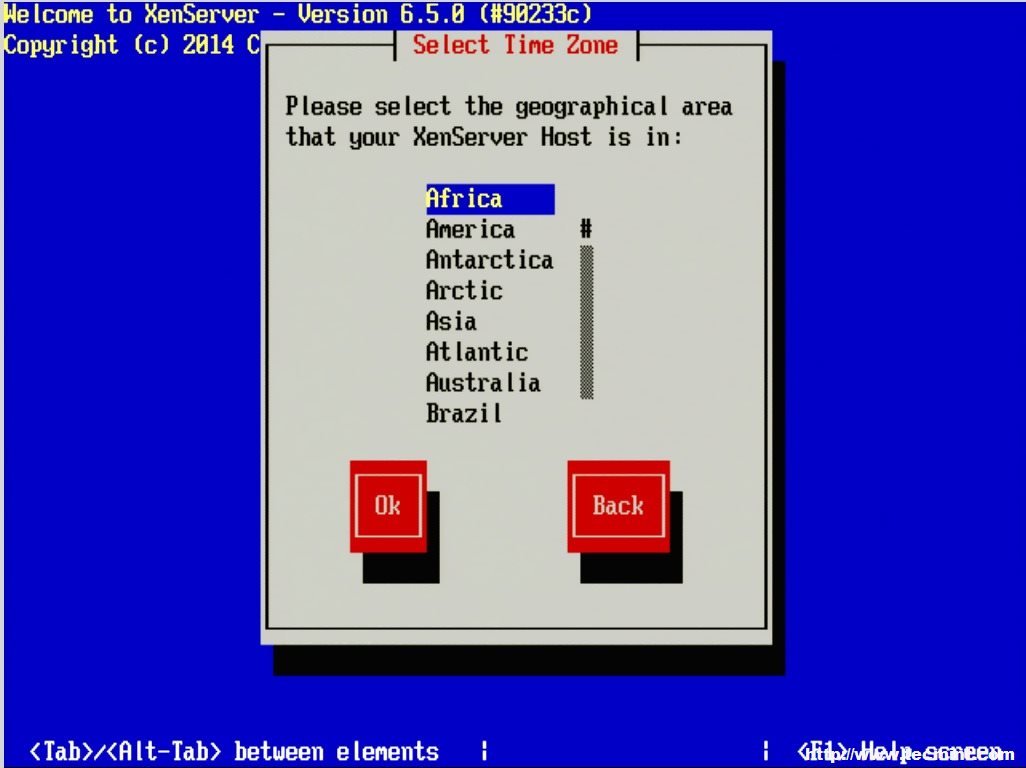
Set Time Zone
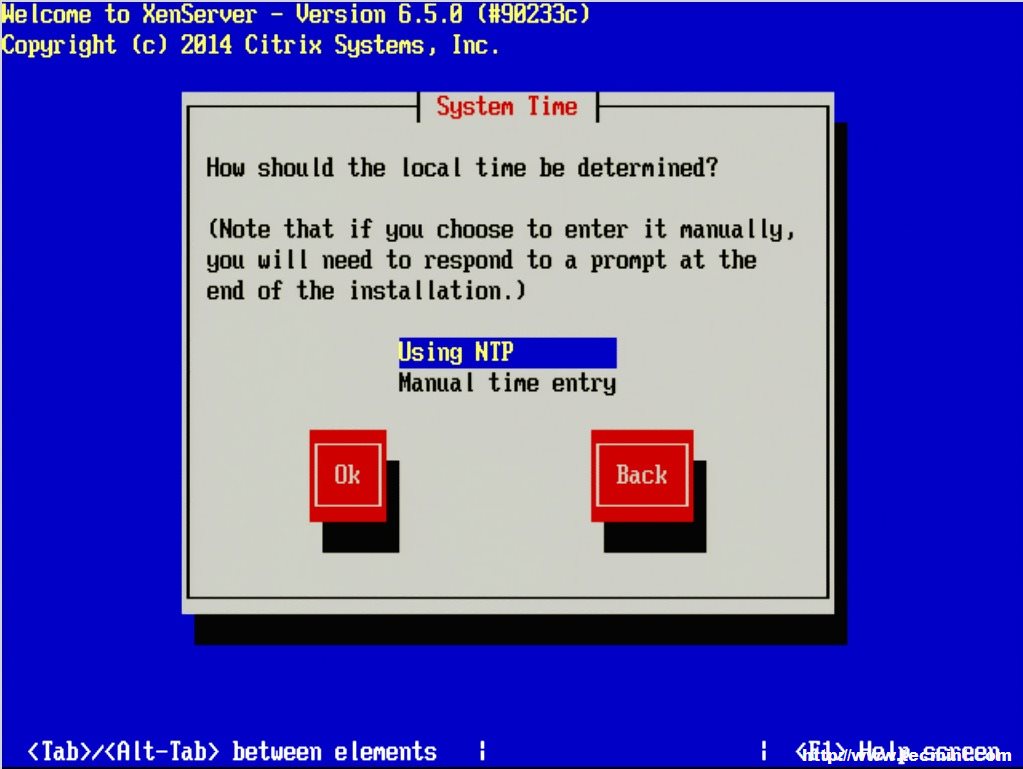
Set Time Using NTP

Add NTP Servers
WARNING – Continuing at this point WILL ERASE ALL DATA on the target disks!
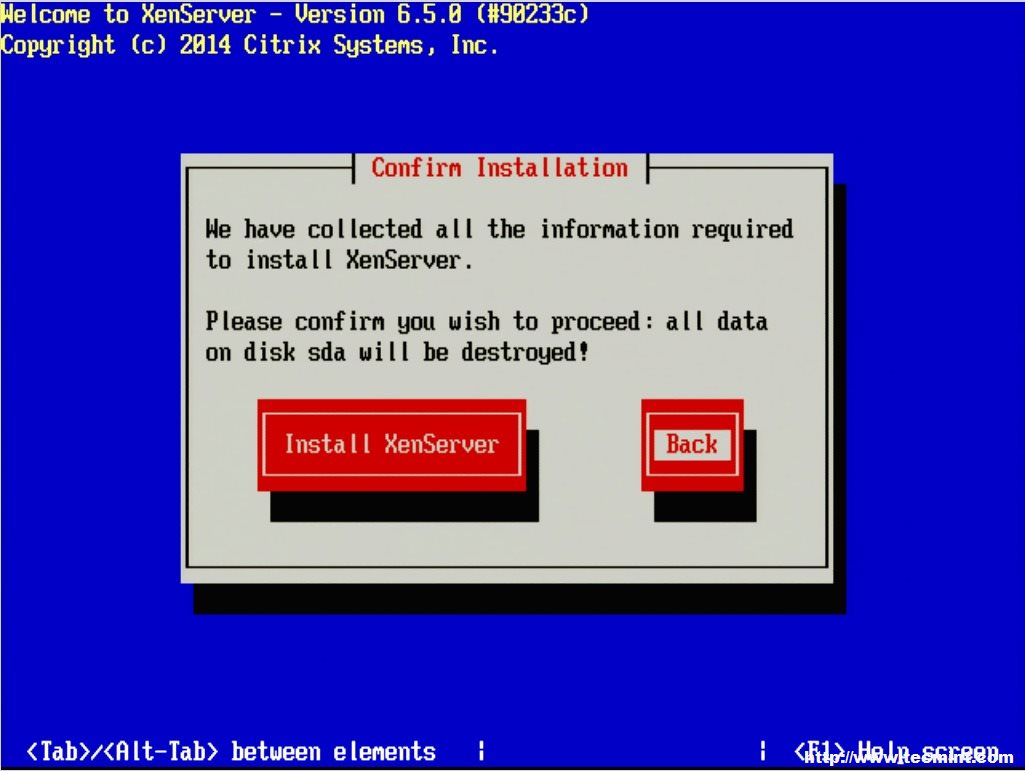
Confirm XenServer Installation Drive
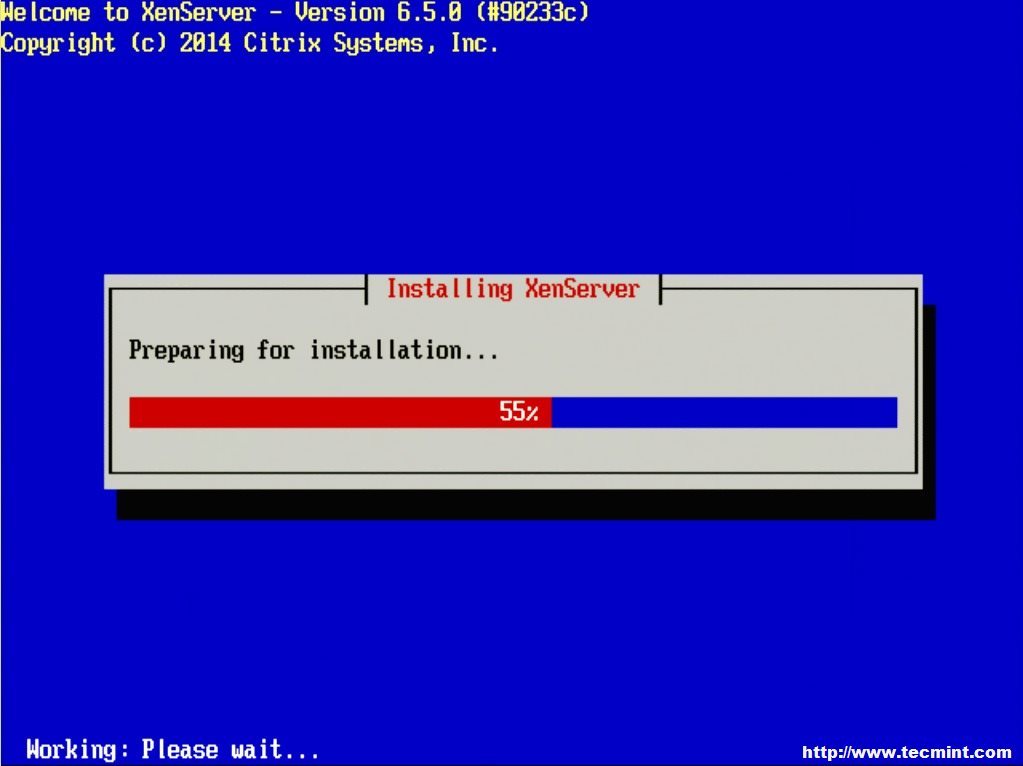
Preparing XenServer Installation

XenServer Installation Complete
Citrix XenServer Booting
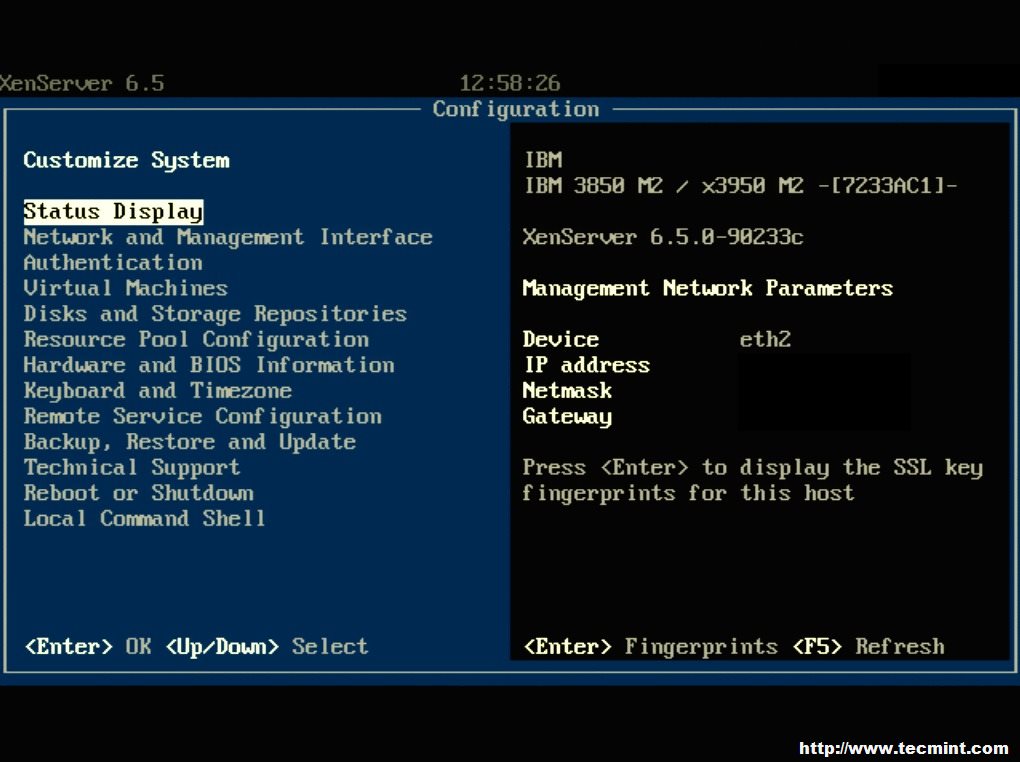
XenServer Configuration Page
Source : https://www.tecmint.com/citrix-xenserver-installation-and-network-configuration-in-linux/2/